
Where to start with designing your own invitation
Ask yourself these questions:
- What are your skills? Making your own stationery can be a simple process or may be more involved where you need tools and experience.
- What is your timeframe? This is important and you need to look at deadlines you may face.
- When do you want your invitations and other stationery ready by?
- What is your budget for stationery?
- What is your theme and colour choice.
A good way to get started is by “playing around” with materials making sure you have your design right. It is also good to step back and look at your creation the next day as well as show to relatives and friends for their honest opinion.
The next step is working out the quantities you need to make your stationery. For example, if you are making a DL invitation you will get 3 panels per A4 sheet. Once you have all your quantities worked out always add in extra sheets of paper that you are printing on as well as envelopes in case the printer “misbehaves” or you make mistakes. When you place your order with dizzi dezine (or other stationery suppliers) always allow time for stock to be ordered in if need be and the time for the deliver your materials. Meanwhile you can be working on your printing set-up and guest list.
The first thing you need to decide is what size you want, DL, square, opening flat etc. Take into account the cost of posting your stationery. In Australia, a DL envelope will cost half as much as any square envelope. Once you decide, choose your envelope. You don’t want to make an invitation first, then to find your envelope doesn’t fit. All our base cards are designed to fit into standard size envelopes which are all online too. If you are scoring and cutting your own card make sure it will fit into the envelope.
Next you need to decide which paper you wish to print on and if you want layers. If you are printing on a translucent paper see below for further hints. If you choose a metallic or other paper these can be glued on with any of our glues online.
Next is the decorative design. There are so many decorative items available from ribbons to crystals, metalworxs motifs, studs, stick ons, shells and starfish that you should have no problem creating a unique design.
How long before the wedding should I send out my invitations?
Send your wedding invitations out at least 8 weeks before your wedding date. This will give your guests enough time to rsvp. Of course, allowing several months would be ideal and will leave less room for any unforeseen delays. Also, a less stressfull bride makes for a happier day
Getting a professional fold line
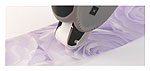
There is no need for expensive machinery to achieve this. Simply use a bone folder (this is what professional book binders use) and a ruler and you’ll have a perfectly symmetrical folded invitation. See our tools section for these supplies. Score reasonably hard for cardweight and use a little less pressure for paperweight and translucents. With cardweight papers, test the fold before making the whole batch. Some metallic (and other thick cardweight papers) can sometimes crack at the fold. If this happens, try scoring the paper both sides and folding gently.
Printing on metallic finish papers, translucent, vellum, and trace papers
(The last 3 are all the same types of paper)
 The best way to print on most papers is with a laser printer but it is possible to print on them using inkjet printers.
For laser printers: The only problems we find with laser printers is that some settings may make the printer too hot and cause the paper to crumple and get stuck in the machine, so its always best to test one sheet of paper on any printer. Experiment with different settings if you are having trouble and you should be able to print without any problems. You may have to handfeed the paper if they stick together (remember to fan the papers before inserting into the tray)
For inkjet printers: Overall, new inkjet printers have great success with printing on these papers as the ink and printer technologies have come a long way in the last few years. Try the tips below to help achieve the best result possible, but sometimes (a small percentage of the time) it is simply not possible and you may have to find a laser printer (from the office – ask the boss first, or a friends laser) to do the job or just change to a different paper. Finishes in papers are all unique, so a particular brand may work with one design, but not another.
- Start off by trying a “transparency” setting as this will control the amount of ink that is put onto the paper and will help prevent a bleed or smudge effect. If the colour looks faded, go into the advanced settings of your printer software (this should be accessible clicking “File – print”) and choose a setting that makes the print heavier (spraying more ink). You can also try a “high” or “fine” setting. Ideally, you want to print slowly with more (only slightly) ink than is normally used. Bleeding ink is not a good sign and probably means that the ink is not suitable for the paper. Try using less ink in this case, but if this does not help, you will probably not be able to use this paper on an inkjet.
- Always test the paper with just a little bit of text on the page in the same colour that you will be using on your invitation. Try one line of text per test and move it down (the text) with every test until you are happy with the result. This way you should only waste one sheet (or a minimum amount ) during the testing process.
- Once printed, leave the paper to dry for at least 24 hours to see if it sets properly, sometimes longer in cold, wet weather. Slide your finger (finger must be dry) over the text to see if it smudges. Try not to rub too vigorously as any ink (laser and inkjet) will smudge under those condition and your guests will certainly not be doing this to the invitation. If you are happy with the result and the ink does not smudge, you are ready for your print run.
- Do a quality check when doing large runs of printing, say every 10 for large runs and every 5 for smaller runs making sure the result is consistent. Do not just hit print and leave expecting that all will be fine.
- Do not press the papers flat under heavy weight, even if they curl slightly (vellums have a habit of doing this). You can do that later and they generally settle down by themselves.
There is no quick result for difficult paper and due to many variable in printers, inks, papers and conditions for printing, there is no rule of thumb in achieving good result, only recommendations. Consult the place where you purchased your paper for help if needed and remember, no-one can guarantee 100 great results with inkjets. A reputable business will gladly take back and refund you for these papers and be wary of any company that guarantees results for these papers. If all else fails, pay a professional to print your paper. When looking at the quality of the print, hold it at arms length away, just like your guest will be reading it. A slight bleed may be seen if you hold it a few inches away, but may not be seen when its at a reasonable distance. The most important advise we give our customers is to always test your materials prior to buying or printing larger amounts and keep checking the quality when (say every 10 sheets), especially when doing a large print job. These tips should help with most papers available, but of course, there are some papers that will not work with anything other than a laser printer. Also, don’t be afraid to ask where you bought the paper from for some printing advise.
Using glue with Translucent, Vellum & Trace & Transparent
 There is no such thing as invisible glue although there are a few hints and tricks to make the glue not show as much. The best way to glue translucent paper is to use a light coloured underlay. The glue doesn’t show through too much this way. Some glues that are good for this are roll tape glues, double sided tape and a small line of clear craft glue all found on our website. If you really want that black or darker underlay forget glue. Try studs, ribbon or hiding the glue with a stick on or decorative strip.
Decorating with Translucent, Vellum & Trace & Transparent papers
There are so many ways to use this paper. Its always the main feature of the invitation so careful you don’t overdo it. The layered look works great, as well as studs in the top & bottom or in all 4 corners. You may also use it as an overlay or a cover.
Creating a layering effect
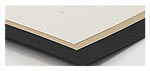 This is a popular way of showing different colours or papers. The base layer should be the size to fit in your choice of envelope and needs to be a card weight as it will from the base of your invitation. The next layer only needs to be a paper weight and looks best 1 cm smaller than the base card. If you are doing a third layer take the size in by 0.5cm. This is only a guide, so play around with different sizes until you have the desired effect of what you are looking for.
Using studs, brads and fasteners
The best and easiest way is to use a hand punch (see tools). This will give you a perfect hole to place your studs in. Another way is to use a sharp point like small scissors or a spike of sorts to push a hole through the materials that you want the stud to go through.
Gluing Ribbon
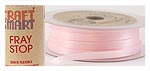 Organza and some double satin ribbon will show the glue through. Its best to either use a roll tape or double sided tape to avoid this. Some ribbons are thick enough to use the clear craft glue with. Testing is always recommended.
Paper Size Conversion table
Please note: All the papers, cardstock and translucents listed on our website are A4 in size unless otherwise specified. |
Stardream and Metallic Comparison chart
We get asked a lot if a certain paper colour matches the Stardream range of paper. Below is a colour comparison chart of our metallic papers and their equivalent colours in the Stardream range. Please note, both papers are exactly the same, they just are named differently.
| dizzi dezine’s Metallic range | Stardream range | |
| Anodised | same as | Anodised |
| Aquamarine | same as | Aquamarine |
| Aubergine | same as | Ruby |
| Azure | same as | Lagoon |
| Bright Red | same as | Jupiter |
| Bronze | same as | Bronze |
| Brown Mist | same as | Brown Mist |
| Cerise | same as | Azalea |
| Coal | same as | Anthracite |
| Copper | same as | Copper |
| Coral | same as | Coral |
| Cream | same as | Opal |
| Cream Mist | same as | White Gold |
| Crystal | same as | Crystal |
| Ebony | same as | Onyx |
| Emerald | same as | Emerald |
| Galvanised | same as | Galvanised |
| Gold | same as | Gold |
| Gold Mist | same as | Gold Leaf |
| Green | same as | Fairway |
| Ionised | same as | Ionised |
| Light Green | same as | Citrine |
| Lilac | same as | Kunzite |
| Lustre | same as | Lustre |
| Marine | same as | Marine |
| Mauve | same as | Amethyst |
| Navy | same as | Lapislazuli |
| Off White | same as | Quartz |
| Old Gold | same as | Antique Gold |
| Orange | same as | Flame |
| White Mist | same as | Ice Gold |
| Plum | same as | Punch |
| Red | same as | Mars |
| Rose | same as | Rose Quartz |
| Sapphire Blue | same as | Sapphire Blue |
| Silver | same as | Silver |
| Sky Blue | same as | Vista |
| White Mist | same as | Ice Gold |
These helpful hints are advise dizzi dezine is happy to pass on from years of stationery making experience. These are practices we follow daily, but we recommend testing any products and assembly prior to making large batches. While we use these principles when producing our own invitations, we accept no responsibility of any damages caused by following this advise.
| Do you have a tip to share or need some advise. Please click here to go to our contact form. In an effort to help others with their stationery, we may list your tip here. Of course, we would not list any personal details and will always ask for your permission prior to listing your advise. |